Witching Hour: Guide For Great Halloween Photographs
Halloween Photography Guide by Steve Anchell
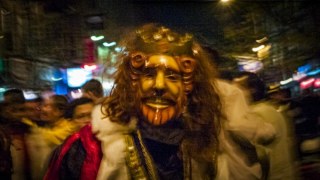
Halloween Photography Guide by Steve Anchell
It’s half past midnight on All Hallow’s Eve. I’m surrounded by Killer Clowns from Outer Space, spooks, goblins, and witches. The Grim Reaper hurries past with his girlfriend, Jack the Ripper is hot on his heels. But wait, there’s Elvis! I thought he was dead! The Joker is wild, Ronald McDonald is out for a stroll, and the Devil is having dinner with an Angel. Fortunately, I have a camera or nobody would ever believe me!
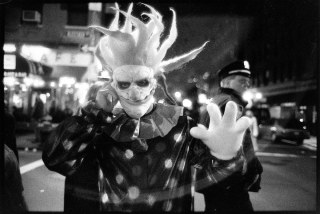
Figure 1. Killer Clown from Outer Space, NYC. Leica with 35mm f/1.4 lens.
Photography by Steve Anchell
Camera and Lens Recommendation
While it is possible to use a DSLR, Mirrorless Interchangeable Lens Cameras (MILC) are simply the best cameras to use for street photography, day or night. There are several reasons for this.
The first is because with a MILC you never lose sight of your subject through the viewfinder or monitor, as you do with a DSLR. The concept of the “decisive moment” was invented by Henri Cartier-Bresson using a Leica M rangefinder camera (the film equivalent to a MILC). It is extremely difficult to capture the decisive moment when the mirror of a DSLR obscures your view even for an instant.
Secondly, having a mirror flip up and down causes camera vibration, which means you cannot use slow shutter speeds without motion blur. Some of the images accompanying this article were made at 1/4 of a second or less, handheld. This is only possible with a MILC camera. Even then, it is important to keep your elbows in tight to your body and brace yourself against a wall, stairway, or other solid object when using slow shutter speeds. For the same reason, always use the camera’s viewfinder, not the monitor because using the monitor requires you to hold your camera away from your body, and the further away the camera is the less stable it becomes.
Any MILC will perform well in the daytime. But if you’re choosing a camera for night photography as part of your repertoire choose one that at ISO 1600 has low noise and a dynamic range of 6.0 or higher in order to record shadow depth. You can determine the dynamic range of almost any camera by consulting the Photographic Dynamic Range versus ISO Setting Chart on Photons to Photos, figure 2. These would include cameras such as the Fujifilm X-T3 (7.52), Sony a6400 (7.21), and Panasonic Lumix DC-GH5 (6.61). The higher the Photographic Dynamic Range the better. So, if it’s within your budget and lowlight photography is something you’re passionate about, consider a Sony a7R IV, Canon EOS RP, or Nikon Z7.
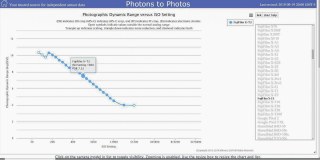
Figure 2. Photographic Dynamic Range versus ISO Setting from Photons to Photos. This shows the Fujifilm X-T3 as having a PDR of 7.52 at ISO 1600
Finally, always use a fast lens. Lenses with a maximum aperture of f/2.8 are always a good choice. My favorite lens for both night and street photography in general is the Sony 35mm f/1.4 G.
Camera Settings for Available Light Night Photography
Regardless of which camera you use, these are my recommendations for handheld night photography.
Begin with an ISO of either 1600 or 2400. Try not to go over ISO 3200 regardless of the circumstances. Don’t worry if the image appears dark in your LCD monitor. Check your histogram and make certain the left side is fully in the box. In almost every case you will be able to bring back the shadows in post-processing, figures 3 and 4.
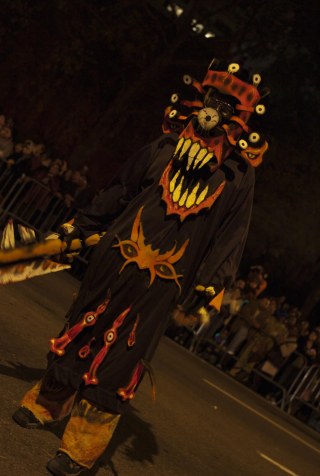
Figure 3. This image was made with a Leica M8 and a 35mm f/1.4 lens using ISO 1250 at 1/11 second and f/2.4.
Photography by Steve Anchell
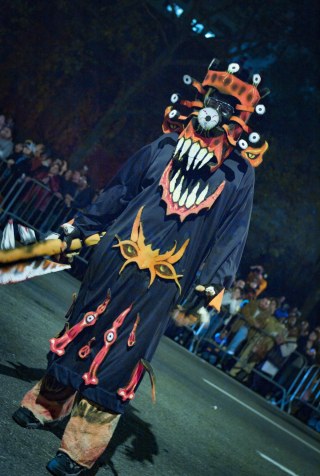
Figure 4. Two stops of exposure were added in post and the color balance corrected by adding blue.
Photography by Steve Anchell
When you aren’t able to correct the color balance, sometimes due to overhead arc lamp lighting and other times due to mixed lighting, convert the image to black and white and apply a grain pattern.
Don’t worry about depth-of-field. You ain’t got no DOF at night! You have what’s being lit by the streetlamp, storefront window, or the cop’s flashlight, and the rest is dark—let it go. Set your camera for Shutter Priority and decide if you want motion blur from subject movement or if you want the image to be tack sharp. If it’s motion blur you’re after use a shutter speed of 1/15 or less. If you want to freeze movement set your shutter speed no lower than 1/30, figure 5, though 1/50 is preferred when you can get it. Unless your subject is moving fast, most will be blur free.
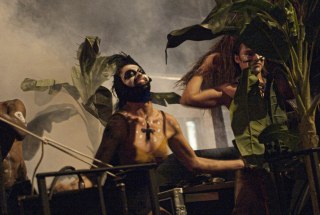
Figure 5. Handheld, available streetlight, ISO 1250 at 1/30 second f/2.4. Embrace the shadows.
Photography by Steve Anchell
My final recommendation is to always use RAW. Images made at night will require post-processing. Using JPG is like placing a filter over your lens. You will be able to remove some of the color in post, but there will always be a green tint. With RAW you will have the ability to manipulate the image to the greatest extent possible. None of the images appearing in this article could have been made using the limited post-processing capabilities of a JPG file.
Technique
There are several techniques you can use to steady yourself. I’ve already mentioned two, brace yourself against a solid object and always use the viewfinder. If there is no solid object, spread your feet wide for a more solid stance. Keep your elbows in close, the closer they are to your body the less body motion. And hold your breath at the moment you release the shutter.
Finally, be aware of where there is light. Streetlamps and storefront display windows are good sources of illumination.
If you would like to learn more about the difference between RAW and JPG read this article on Photography Life, RAW vs JPEG—Which Image Format is Better and Why?
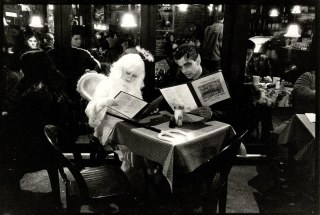
It was lucky I had a camera, or nobody would have believed this.
Photography by Steve Anchell
Steve Anchell is a photographer, writer, and workshop instructor. More information on digital techniques can be found in his books, Digital Photo Assignments and Mirrorless Interchangeable Lens Cameras: Getting the Most from Your MILC, available online.
Visit his web site at https://anchellworkshops.com
